
16 February 2026
Choosing A Vintage Reverb For Your Studio
A Practical Guide For Modern Producers And Engineers

Why Add A Vintage Reverb To A Modern Studio?
Adding a vintage reverb to a modern studio is rarely about nostalgia. It is about introducing a specific type of spatial behaviour and sonic identity that developed during a formative period in recording history. Early hardware reverbs were shaped by technological limitations, converter design, analogue circuitry, and algorithm development choices that were unique to their era. Those constraints often produced results that remain difficult to reproduce precisely in contemporary software.
One of the most compelling reasons to choose vintage hardware is algorithm design. Early digital reverbs from companies such as Lexicon, AMS, Yamaha, and Quantec were built around proprietary mathematical structures and limited processing power. The diffusion patterns, modulation rates, and decay envelopes were not generic. They were engineered around the hardware available at the time. Many modern plug-ins emulate these units, but the original interaction between algorithm, converters, and analogue output stages created a combined behaviour that is specific to the hardware itself.
Converter and analogue stage colouration also play a role. Early digital units used converter technology that imposed its own texture, headroom characteristics, and noise floor. The analogue input and output stages further shaped the signal before and after the digital processing. This cumulative path contributes to the sense of density and cohesion often associated with classic hardware reverbs.
There is also the matter of tactile workflow. Hardware reverbs encourage commitment. Adjustments are made in real time, often during tracking or mixing, and printed into the session. The physical interface, dedicated controls, and program based architecture can shape creative decisions in ways that differ from scrolling through software presets. For some studios, this shift in workflow is as valuable as the sound itself.
Historical sonic signatures are another consideration. Many iconic recordings relied on specific hardware reverbs that became part of the musical language of their era. The gated ambience of the 1980s, dense modulated vocal tails of the late 1970s and 1980s, and tightly controlled digital rooms of the early 1990s were all shaped by identifiable hardware units. Owning and using those devices connects directly to that recorded heritage.
Finally, vintage reverbs often exhibit depth and modulation characteristics that feel distinct from many contemporary plug-ins. The interaction between limited processing resources, modulation schemes, and analogue circuitry can produce movement and spatial layering that is recognisably different. For studios seeking a clearly defined spatial identity rather than a transparent effect, this distinction remains highly relevant.

One of the most striking examples of expansive studio reverb use can be heard in the mix of Bonnie Tyler’s Total Eclipse of the Heart, where almost every element apart from the bass and kick drum was driven heavily into reverb to create a vast, dramatic sense of space.
What Do You Want The Reverb To Do?
Vintage Reverb For Vocals
For lead vocals, engineers often look for smooth long tails that support rather than dominate the performance. Classic digital units became known for their ability to create dense, modulated decays that avoid metallic ringing while maintaining clarity. Subtle modulation within the diffusion structure helps prevent static resonance build up and keeps sustained notes moving.
Controlled brightness is also critical. A vocal reverb must add presence and space without exaggerating sibilance or high frequency harshness. Many early high end digital reverbs achieved this balance through carefully tuned high frequency damping and diffusion behaviour.
Placement within the mix is the final consideration. The right vocal reverb creates a sense of dimension while keeping the singer forward. It supports depth without pushing the vocal too far back.
Units commonly associated with this role include the Lexicon 224, Lexicon 480L, EMT 250, and AMS RMX16.

Vintage Reverb For Drums
Drum reverb places different demands on the processor. Short bright rooms can add impact and dimension without washing out transients. Tight early reflections and controlled decay times help preserve rhythmic clarity.
Gated ambience and nonlinear programs became defining production tools in the 1980s. These programs shape the decay envelope so that it cuts off abruptly rather than fading naturally, creating a punchy and dramatic effect that became synonymous with that era’s snare sound.
Classic 1980s snare textures were built around specific hardware designs that responded predictably to transient heavy material.
Notable units in this category include the AMS RMX16, Yamaha REV7, and Yamaha SPX90.

Vintage Reverb For Natural Room Simulation
Some vintage digital reverbs were engineered to prioritise early reflections and spatial realism over dramatic tails. In this context, the goal is perceived depth without excessive decay. The reverb should enhance dimensionality while maintaining articulation.
Early reflections behaviour becomes more important than overall tail length. Carefully structured reflection patterns can simulate room boundaries and positioning, helping instruments sit naturally within a stereo field.
Realistic acoustic modelling in early digital hardware was limited by processing power, yet certain designs achieved convincing results by focusing on reflection structure rather than sheer algorithmic complexity.
Units frequently associated with this approach include the Quantec Room Simulator and the EMT 250.

Vintage Reverb For Synth And Ambient Production
For synthesiser based music and ambient production, the priorities shift toward long modulated tails and immersive diffusion. Sustained pads and evolving textures benefit from reverb programs that introduce movement and density over time.
Shimmering diffusion and modulation depth can transform simple harmonic material into expansive soundscapes. In this context, the reverb becomes an instrument in its own right rather than a subtle spatial enhancement.
Textural sustain is key. The reverb must hold and evolve without collapsing into grain or harshness, particularly at extended decay times.
Units often favoured in this space include the Lexicon PCM Series, Roland SRV Series, and, where delay and spatial modulation intersect, the TC Electronic 2290.
Defining the intended role of the reverb at this stage ensures that subsequent decisions about era, budget, and maintenance are grounded in a clear creative objective rather than brand reputation alone.

Bit Depth
Electromechanical vs Early Digital: Understanding The Architecture
Before selecting a specific unit, it is useful to understand how different reverb technologies generate space. The architecture behind the device determines not only its sound, but also its maintenance demands, studio footprint, and workflow implications.
Electromechanical Reverb
Electromechanical reverbs generate ambience through physical means. Large metal plates or suspended spring assemblies are excited by a transducer, and the resulting vibrations are captured by pickups. The decay, density, and tonal balance are shaped by the physical properties of the material and its mechanical behaviour.
Physical plates or springs introduce a form of natural diffusion that is inherently complex. The sound is created by mechanical energy transfer rather than mathematical calculation. This gives electromechanical units a density and cohesion that became foundational to many recordings from the 1960s and 1970s.
However, maintenance requirements must be considered. Moving components, tensioning systems, and ageing electronics require ongoing care. Mechanical units are also large and heavy, and studio space considerations are significant. A full size plate reverb demands a dedicated area with structural support and acoustic isolation.
Early Digital Algorithmic Reverb
Early digital reverbs replaced mechanical energy with mathematical modelling. These units relied on discrete converter stages and dedicated processing hardware. Limited bit depth and sample rate imposed constraints that influenced the final sound.
Characterful modulation became a defining feature. Subtle pitch variation within the algorithm helped prevent static ringing and added movement to sustained decays. Because processing power was finite, the structure of the algorithms was deliberate and highly individual to each manufacturer.
Workflow was typically program based. Users selected from a range of preset structures and adjusted key parameters rather than building complex signal paths from scratch. This approach shaped the way engineers interacted with space during tracking and mixing.
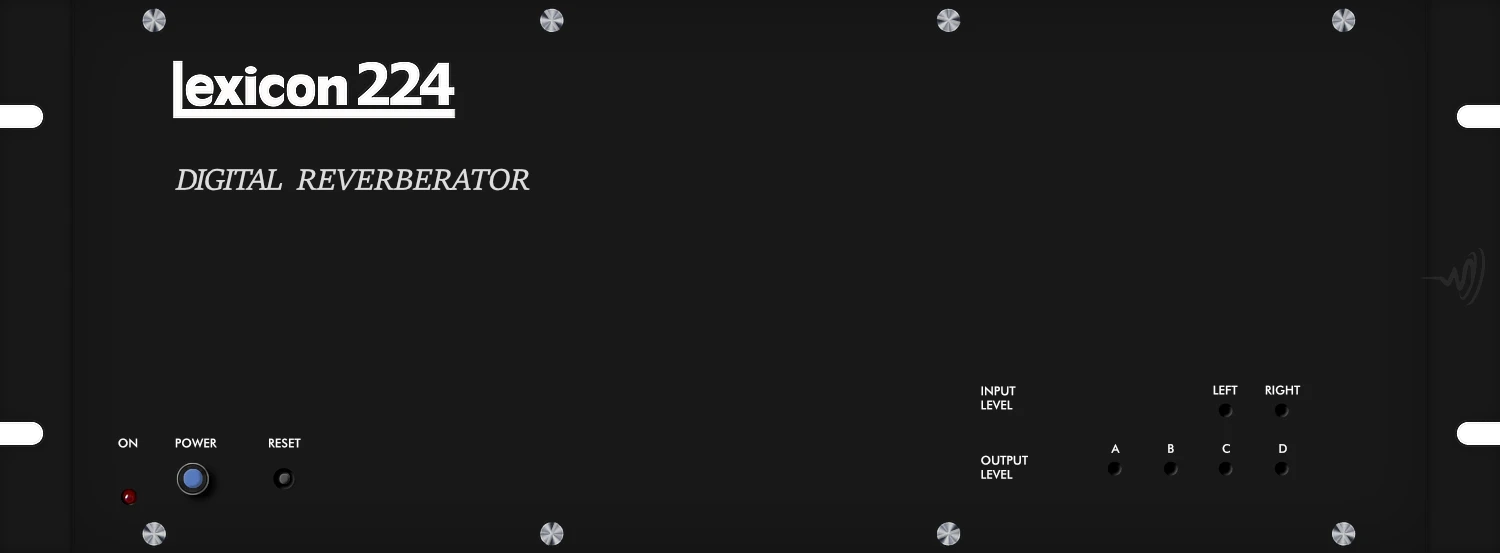
Notable examples include the Lexicon 224, AMS RMX16, and Yamaha REV7.
Early Digital Room Simulation Specialists
Within early digital design, some manufacturers focused specifically on reflection modelling and spatial realism. Rather than emphasising dramatic modulation or long lush tails, these units prioritised early reflections behaviour and controlled decay envelopes.
The goal was to recreate believable acoustic spaces that enhanced depth without overwhelming the source. Reflection timing and envelope shaping were central to this design philosophy. The resulting reverbs were often described as precise and spatially coherent.
Units associated with this approach include the Quantec Room Simulator and the EMT 250.
Understanding these architectural differences clarifies why certain vintage reverbs excel in specific roles. The underlying technology shapes not only the sound, but also the ownership experience and integration demands within a modern studio.

The EMT 140 is a classic electromechanical plate reverb that generates ambience through the vibration of a large suspended metal plate. An input transducer excites the plate, and contact pickups capture the resulting reflections, producing a dense, smooth decay that became a defining studio sound throughout the 1960s and 1970s.
Choosing By Era And Aesthetic
1970s Studio Sound
The 1970s studio environment was dominated by plates and physical chambers. Large electromechanical systems and purpose built acoustic spaces provided the primary sources of artificial ambience. The resulting sound was typically dense and smooth, with a cohesive decay that blended naturally into analogue tape recordings.
Modulation was minimal compared to later digital designs. Movement within the reverb tail came from the physical complexity of vibrating metal or room reflections rather than programmed pitch variation. The overall aesthetic emphasised warmth, depth, and integration within the mix rather than dramatic spatial effects.
Studios seeking a classic 1970s character often prioritise plate style behaviour and natural room ambience to support vocals, drums, and orchestral material.
1980s Production Aesthetic
The 1980s marked a decisive shift toward digital processing. Hardware reverbs introduced gated ambience, nonlinear decay structures, and brighter, more forward tails that cut through increasingly dense productions.
Strong modulation became a defining characteristic of many digital units. Subtle pitch movement within the decay helped create width and shimmer, particularly on vocals and snare drums. The reverb was no longer simply a background enhancement. It became a stylistic statement.
Bright, tightly controlled digital rooms and dramatic gated snare reverbs are emblematic of this era. Choosing a reverb associated with this period immediately evokes that production language.
1990s Digital Refinement
By the 1990s, digital technology had advanced significantly. Cleaner converters reduced noise and distortion, while increased processing power allowed smoother diffusion and more complex internal structures.
Greater preset flexibility and expanded parameter control gave engineers more detailed shaping options. The overall aesthetic moved toward refinement and transparency, with reverbs designed to sit naturally within high resolution mixes.
Studios aiming for a polished, spacious yet controlled sound often gravitate toward units from this period, where realism and flexibility were prioritised alongside character.
Classic Tracks
Explore some of our Classic Tracks to hear how reverb has been used differently across the decades. It will help you decide which type of reverb best suits what you are aiming to achieve.
Reliability, Servicing, And Ownership Reality
Any decision to purchase vintage hardware must include a realistic assessment of reliability and long term support. Unlike modern equipment, many classic reverbs are now several decades old. Their continued performance depends as much on maintenance history as on original design.
- Ageing power supplies are one of the most common issues. Electrolytic capacitors degrade over time, regulators drift out of tolerance, and internal heat can accelerate component wear. A unit that appears functional may still require preventative servicing to ensure stable operation and avoid unexpected failure.
- Battery backed memory loss is another frequent concern in early digital processors. Many units rely on internal batteries to retain presets and calibration data. When these batteries fail, memory can be lost or corrupted. Replacement is usually possible, but neglect can lead to data loss or circuit damage.
- Display failures are also typical in older digital hardware. Vacuum fluorescent displays and early LCD panels can dim, flicker, or stop functioning entirely. Replacement parts are not always readily available, and repair may require specialist knowledge.
- Obsolete digital chips present a more serious long term consideration. Some early reverbs use custom integrated circuits or discontinued processors that are no longer manufactured. If a critical chip fails, sourcing a replacement can be difficult and expensive. In certain cases, parts must be salvaged from donor units.
- The availability of qualified service technicians is therefore crucial. Not all repair centres are equipped to handle vintage digital hardware, particularly units with proprietary architectures. Before purchasing, it is advisable to confirm that servicing expertise is accessible within your region.
- Shipping risks and weight considerations should not be underestimated. Large electromechanical reverbs are heavy and structurally complex. Improper packaging can result in physical damage during transit. Even rackmount digital units require careful handling to protect displays, connectors, and internal boards.
Addressing these ownership realities openly builds trust and ensures that purchasing decisions are informed by practical considerations as well as sonic appeal.
Repairers Directory
Vintage Reverb Budget Tiers
Entry Level Vintage Hardware
Entry level units offer access to recognisable vintage character without the cost or complexity of flagship systems. These processors are typically compact, rackmount designs that integrate easily into smaller studios.
The Yamaha SPX90 and the Roland SRV Series are often positioned in this category. They provide distinct early digital textures, including short rooms, gated ambience, and characteristic diffusion patterns that remain musically useful.
While they may not offer the depth or refinement of higher tier systems, they function effectively as accessible character tools. Servicing is generally more straightforward than with larger electromechanical systems, and physical footprint is minimal.


Midrange Vintage Digital Reverbs
Midrange processors occupy a space where cost and performance are balanced. These units are widely recognised in professional recording history and offer identifiable sonic signatures that have appeared on countless productions.
The Lexicon PCM Series, AMS RMX16, and Klark Teknik DN 780 are representative examples. They deliver more complex algorithm structures, greater parameter control, and a stronger association with specific production aesthetics.
Ownership at this level requires attention to servicing and component ageing, but these units are often considered a practical entry point into serious vintage digital reverb without reaching flagship pricing.

High End Studio Classics
At the top of the market are studio classics that represent significant financial and logistical commitments. These units are frequently associated with major studios and landmark recordings, and their prices reflect both rarity and reputation.
The Lexicon 480L, EMT 250, Quantec Room Simulator, and EMT 140 sit firmly in this category.
Investment at this level extends beyond purchase price. Servicing costs, shipping logistics, physical space requirements, and potential part scarcity must all be considered. Electromechanical systems such as large plates require dedicated space and structural support, while early digital flagships may rely on components that are no longer manufactured.
For studios prepared to manage these factors, high end vintage reverbs can become defining elements of a facility’s identity. The decision, however, should be based on long term ownership considerations rather than short term prestige.

Integrating Vintage Reverb Into A Modern Hybrid Setup
Adding a vintage reverb to a contemporary studio is not simply a creative decision. It also requires careful technical integration. Early hardware was designed for analogue consoles and tape machines, and understanding how it interfaces with modern converters and DAW based workflows is essential.
Balanced analogue I/O levels must be confirmed before installation. Many vintage digital reverbs operate at professional line level, but nominal operating levels can vary. Matching input and output levels correctly prevents distortion on peaks and avoids unnecessary noise from under driven inputs. Proper calibration ensures that the unit performs as intended within a modern signal chain.
Noise floor management is another practical consideration. Early digital processors often exhibit higher background noise compared to modern plug-ins. Careful gain structure, clean power, and quality cabling help maintain clarity. In hybrid systems, keeping analogue cable runs short and maintaining correct reference levels reduces cumulative noise.
Gain staging with converters is critical. When routing audio from a DAW to an external reverb and back again, signals pass through digital to analogue conversion and then analogue to digital conversion. Setting appropriate send and return levels ensures optimal headroom and avoids clipping at any stage. Monitoring peak and average levels carefully during setup prevents distortion and preserves dynamic range.
DAW routing through hardware inserts must also be configured correctly. Most modern workstations support external insert paths that compensate for round trip latency. Accurate delay compensation ensures that the processed signal remains phase aligned with the dry track. Without this correction, timing inconsistencies can occur, particularly with short room programs.
Recall limitations and session documentation should be acknowledged. Unlike plug-ins, vintage hardware does not store settings automatically within a project file. Engineers must document parameters manually or photograph front panels. Some later units allow preset storage, but complete recall still requires disciplined workflow practices.
Stereo versus mono input behaviour is another factor. Some classic reverbs accept mono input and generate a stereo output, while others allow true stereo processing. Understanding the internal signal path helps determine how the unit will respond to stereo sources such as keyboards or drum overheads. This can influence routing decisions and creative outcomes.
DAW Integration
Be sure to check out our DAW Integration article, along with our review of the new MOTU interfaces, where we cover integration using a summing mixer.
When A Vintage Reverb May Not Be The Right Choice
While vintage reverbs offer distinct character and historical appeal, they are not universally suitable for every studio or production environment. An honest assessment of workflow and practical constraints is essential before committing to hardware.
Heavy recall dependent workflows can present challenges. In environments where sessions are reopened frequently and precise settings must be restored instantly, hardware introduces complexity. Even units with preset memory require external documentation, and exact recall of analogue controls may not be possible. In fast paced commercial production, this limitation can outweigh the sonic benefits.
Touring rigs are another scenario where vintage hardware may be impractical. Older processors and electromechanical systems were not designed for constant transportation and vibration. The risk of physical damage, component failure, or calibration drift increases significantly outside a stable studio environment.
Zero maintenance tolerance is also a decisive factor. Vintage equipment requires periodic servicing, component replacement, and troubleshooting. Studios that prioritise reliability above all else, or that lack access to qualified technicians, may find modern alternatives more suitable.
Fully in the box production environments present a different consideration. When all processing occurs within a DAW, adding external hardware introduces additional conversion stages, cabling, routing complexity, and latency management. For producers who rely on total session portability and instant recall, software solutions may align more closely with their workflow.
Recognising these limitations does not diminish the value of vintage reverb. Instead, it ensures that the decision to invest is based on clear operational requirements rather than reputation alone. Balanced evaluation strengthens authority and helps studios make informed, practical choices.
